The old-fashioned apple stack cake carries the full weight of Appalachian history. Mountain women passed it down one layer at a time. Each layer holds a tale of hard work, dried apples, and community bonds.
The tradition began in cabins with dirt floors, where smoke from wood stoves clung to the rafters, and every cake told who had married, who had mourned, and who had made it through the winter.
Women baked their layers days in advance and stored them in cloth-lined tins, waiting for the moment when neighbors arrived, each one carrying flour or sorghum wrapped in brown paper.
Some used cast-iron skillets to shape the layers, while others used the backs of pie pans as molds. There were no written instructions, only memory and repetition.
The layers were often thin like biscuits, but once stacked with thick apple mash, the cake became a dense tower of sweetness and spice. It did not need icing. It needed patience.
Let’s learn how to make this cake from scratch, using the traditional method with a homemade apple filling.
What Is an Old-Fashioned Apple Stack Cake?
An old-fashioned apple stack cake is a multi-layered dessert constructed with thin, molasses- or sorghum-based cake layers and a spiced dried apple filling. It originates in the Appalachian Mountains.
The flavor improves after resting for one to two days. That tradition comes from community weddings, where each guest brought a layer. Usually, they would be stacked and have a spread of apple filling between them.
Story Behind the Mountain Stack Cake
Old-time mountain recipes often came out of necessity. Appalachian families dried apples in the sun. They used sorghum or molasses as a substitute for sugar.
Flavors like cinnamon and ginger grew strong over time. That made the cake ideal for gatherings where fresh ingredients were scarce. The Appalachian apple stack cake became a signature wedding dessert.
Old-Fashioned Apple Stack Cake
Equipment
- Large saucepan (for apple filling)
- Mixing bowls
- Electric mixer or whisk
- Rolling pin
- Baking sheets
- Parchment paper or silicone mats
- Measuring cups and spoons
- Serrated knife (for slicing)
Ingredients
- 4 cups dried apples
- 3 cups water
- ½ cup brown sugar
- 2 tsp cinnamon
- ½ tsp ground ginger
- 4 cups all-purpose flour
- 1 tsp baking soda
- ½ tsp salt
- 1 cup sorghum or molasses
- ½ cup shortening
- 1 cup buttermilk
- 1 egg
- 1 tsp vanilla extract
Instructions
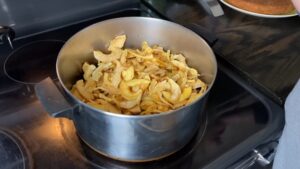
- Prepare Apple FillingIn a saucepan, combine dried apples and water. Simmer over low heat until soft (30–40 minutes). Mash the apples with a spoon, then stir in brown sugar, cinnamon, and ginger. Cook until thick and jam-like. Set aside to cool.
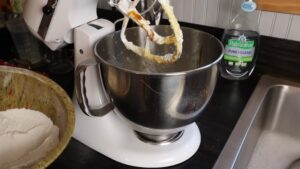
- Make Cake DoughCream shortening and brown sugar until fluffy. Beat in egg, vanilla, and sorghum. In a separate bowl, mix flour, baking soda, and salt. Alternate adding flour mix and buttermilk to the wet ingredients until a soft dough forms.
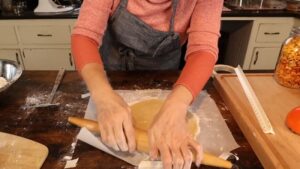
- Roll and Bake LayersDivide the dough into 6 or 7 equal portions. Roll each into a thin 8-inch round. Place on parchment-lined baking sheets. Bake at 350°F for 10 minutes until golden. Cool completely.
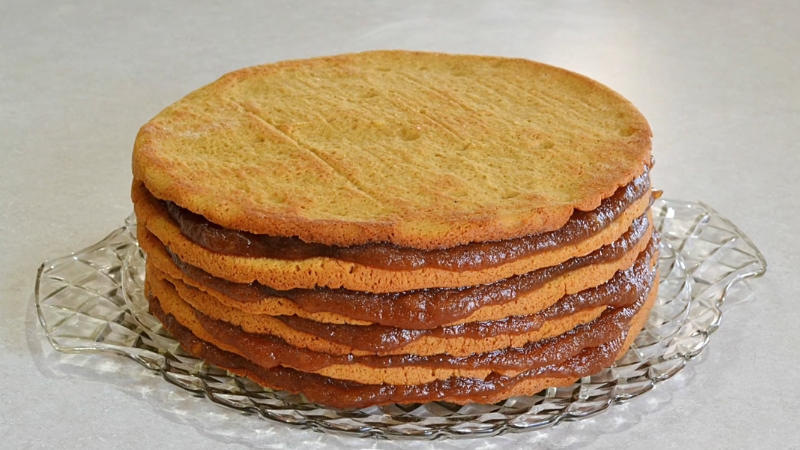
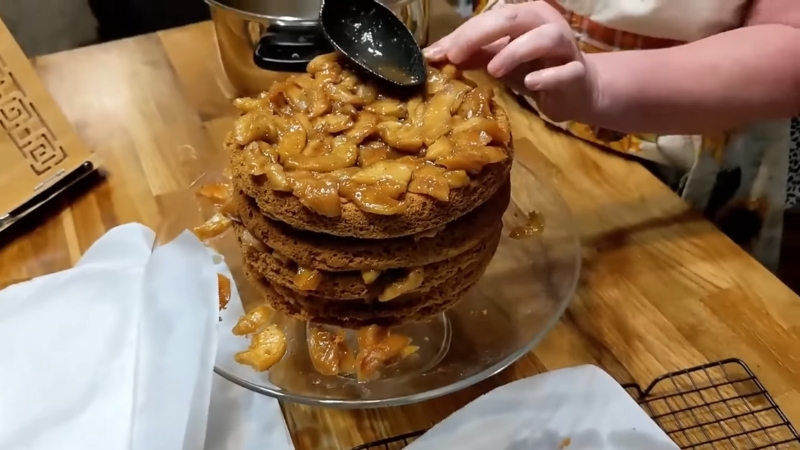
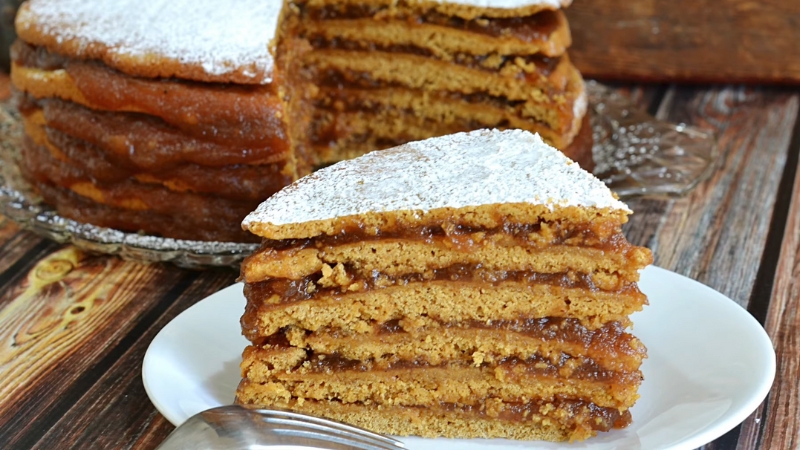
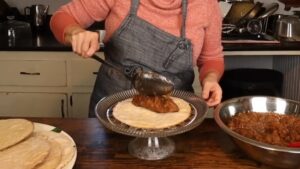
- Stack the CakePlace one layer on a serving plate. Spread apple filling evenly over the top. Repeat until all layers are stacked. Do not spread filling on the top layer.
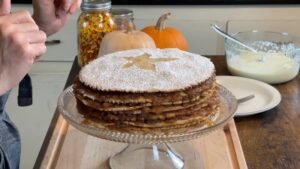
- Rest the CakeWrap the cake tightly in plastic wrap or a clean cloth. Let rest at room temperature for 48 hours. This allows the apple filling to seep into the layers and soften the cake.
Video
Notes
Cooking Tips
- Always use dried apples; fresh ones make the filling watery.
- Roll layers thin like cookies for even softening.
- Use a food processor to speed up apple filling preparation.
- Allow a full 48-hour rest before serving for best texture.
- Freeze unfilled layers if prepping in advance.
Regional Variations in Hill Country Apple Cake
Some use apple butter instead of stewed apples. Others add black walnuts or raisins. Some switch sorghum for honey. Recipes shift between countries. Each variation holds local pride.
Region
Key Change
Eastern Kentucky
Black walnuts added
Western Virginia
Honey replaces sorghum
Tennessee hills
Apple butter filling
Carolina border
Raisins mixed with apples
Old-time cooks often used what they had. No two cakes tasted the same. Personal touches made each one part of family memory.
Apple Stack Cake and Southern Heritage
@sarahfromappalachia Replying to @appleuser98235990 Apple Stack Cake 🍏🍎🍏🍎🍏 Link to recipe: https:/blindpigandtheacorn.com/apple-stack-cake-2/ #applestackcake #fyp #appalachianrecipes #appalachiandesserts #appalachia #appalachian #appalachianmountains #oldrecipes #applecake #foryoupage #appalachianfolklore #appalachianfood #appalachianfolkmagic #appalachianwedding #appalachiantradition #appalachianbeliefs ♬ Wildwood Flower (Instrumental) – Toni Giménez
Southern heritage desserts emerged from necessity, not decoration. The old-fashioned apple stack cake evolved during seasons when families used everything they had, saving apple skins in buckets, drying cores on window screens, and packing leftover fruit into jars sealed with wax.
These cakes never sat untouched behind glass or waited for praise. They were earned with flour dust on aprons and heat from open fires.
During the Great Depression, when sugar vanished from pantries, dried fruit filled the gap. Stack cake became more than a dessert. It turned into proof that families could make do and still create something sweet enough to remember.
Women passed the method down through silence and motion, not paper. Each bite tasted of memory and work.
How to Store and Serve Mountain Stack Cake
A mountain stack cake can be stored at room temperature without refrigeration, remaining fresh for up to a week when kept in a cool, dry place. If chilled, it stays fresh for ten days without losing flavor or texture.
Use a serrated knife to slice through the firm layers without breaking them apart. Many families serve it with hot coffee or warm cider, though buttermilk remains a traditional favorite for older generations.
Resting the cake for at least forty-eight hours before slicing allows the apple filling to seep into the layers and soften the entire stack. That resting time turns a stiff cake into a rich, unified whole with deep flavor in every bite.
Most Appalachian families baked it on a Thursday or Friday, knowing that by Saturday the cake would be ready for a church supper or wedding meal.
My First Time Making Hill Country Apple Cake
View this post on Instagram
I followed the recipe using my grandmother’s notes, which she had scribbled on the back of a yellow envelope and tucked into an old cookbook. Her handwriting sloped with age, but each number held years of precision.
She dried apples in wide trays on the porch, letting the late-summer sun do the work that no oven could match. Her hands never stopped moving, steady and sure, as she peeled, stirred, and pressed each layer with quiet focus.
I did not question her steps. I followed each line as if it had come from something sacred.
We cooled every layer on the same iron skillet she had used for decades, one that smelled faintly of lard and wood smoke. She reminded me again and again that the cake had to rest before anyone took a bite.
No shortcuts, no tastes before time. That night, I went to bed with the scent of cinnamon and molasses still on my fingers, and I swore I heard her humming near the stove long after the fire had gone out.
Common Mistakes to Avoid
Mistake
Why It Matters
Correct Approach
Layers too thick
The cake becomes dense and does not soften properly
Roll layers very thin, like large cookies
Watery filling
Makes layers soggy and causes leaks
Cook apples until thick and spreadable
Using fresh apples
Texture becomes mushy, and flavor stays weak
Always use dried apples for structure
Skipping the rest period
The cake stays dry and does not develop a deep flavor
Let rest for at least 48 hours before slicing
Thin apple layer
Creates gaps between layers and weak cohesion
Spread an even and generous layer of filling
Cutting too early
Layers break apart, and the cake falls apart
Wait two days and use a serrated knife